I am so thankful that even though I live in the country where the majority does not celebrate Christmas, it is still looked upon as a national holiday, therefore...no school. With that being said, a variety of Christmas decorations are harder to come by here and are a bit pricier compared to back home. Don't get me wrong, there is still a Christmas section at the local grocery store. But a lot of it looks like what you would find on clearance after the holidays in the states, an overload of glitter and tinsel. Not exactly our taste in decorations. This is probably not the case everywhere in Korea, but it has certainly been my experience. So in an effort to have decorations similar to what we would have back home I set to work on four different crafts which are simple and inexpensive enough to do anywhere.
Star Garland
What you need:
card stock paper
hole punch
twine
hooks
I did this craft last year in a smaller size in order to make a silver star for the top of our tree. I printed out a star shape and traced it onto card shock and cut it out. I then folded it along each point of the star.
It turns out like this. You'll have to go through each one and fold in and out so it 'pops' out.
Lastly, I punched holes in them and hung them across the window.
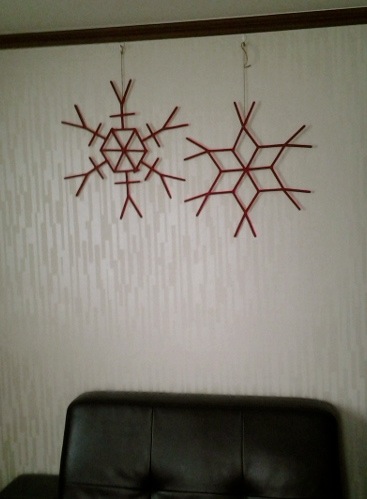
Popsicle stick snowflakes
What you need:
hot glue gun (this is preferable but I used tacky glue and it still worked)
popsicle sticks
paints
twine to hang it
hooks
I would have loved to hang these a little lower since I think it looks odd that they're so high up but our psycho cat loves to try and jump and get these...so up they go. (by the way, don't you love the glitter wall paper we have? Guess Korea wants to be in Christmas mode year round)
Banner
What you need:
twine
card stock
mini clothes pins
This was probably the easiest craft I made this year since I found this site and they already have the letters ready to print. I did, however, resize them to 75% of the original size and in my opinion they are still a bit to large for what I was going for. I would suggest 50%. I then cut out the triangles and placed them on a dark red paper. To finish, I clipped each letter to the twine with a mini clothes pin and hung it up!
Christmas Trees
What you need:
card stock paper
felt (I used felt with a sticky side so I didn't have to glue each one)
This was my favorite by far, I'm so happy with how they turned out. It took me a bit longer than I thought because I was too picky about the layering and kept redoing it but if you get it right the first time it will only take about an hour and a half.
First, you trace and cut about a million little circles onto the felt. (or if you're really lucky, your local craft store will already have circular felt pieces. I wasn't so lucky this time) This was by far the longest part and took me the whole length of a movie to complete circles for both trees.
Make a cone shape from card stock and tape it together.
Next, cut the excess off of the bottom. One site suggested putting a small paper cup in the bottom of the cone so it makes it easier to cut. I tried it both ways and the cup really does make it so much easier to cut a straight line all the way around.
You're finally ready to put it together! I layered it all the way to the top then placed one of the circles over the point and then layered them all around it. Make sense? Hope so.
What do you think? Would you use any of these in your home? Hope everyone is enjoying the start of Christmas season!
Next week I'll have pictures of our tree up along with some homemade ornaments!


